Pixel image repair after screen replacement
If you have gotten the DIY urge and chosen to replace your cracked screen, or even remove a perfectly functional screen just to replace the battery on a pixel 1 or pixel 2 device you should know of this common mistake that many DIY-ers cause.
When removing the screen it is important to heat the front screen to loosen the adhesive securing the LCM panel to the frame.
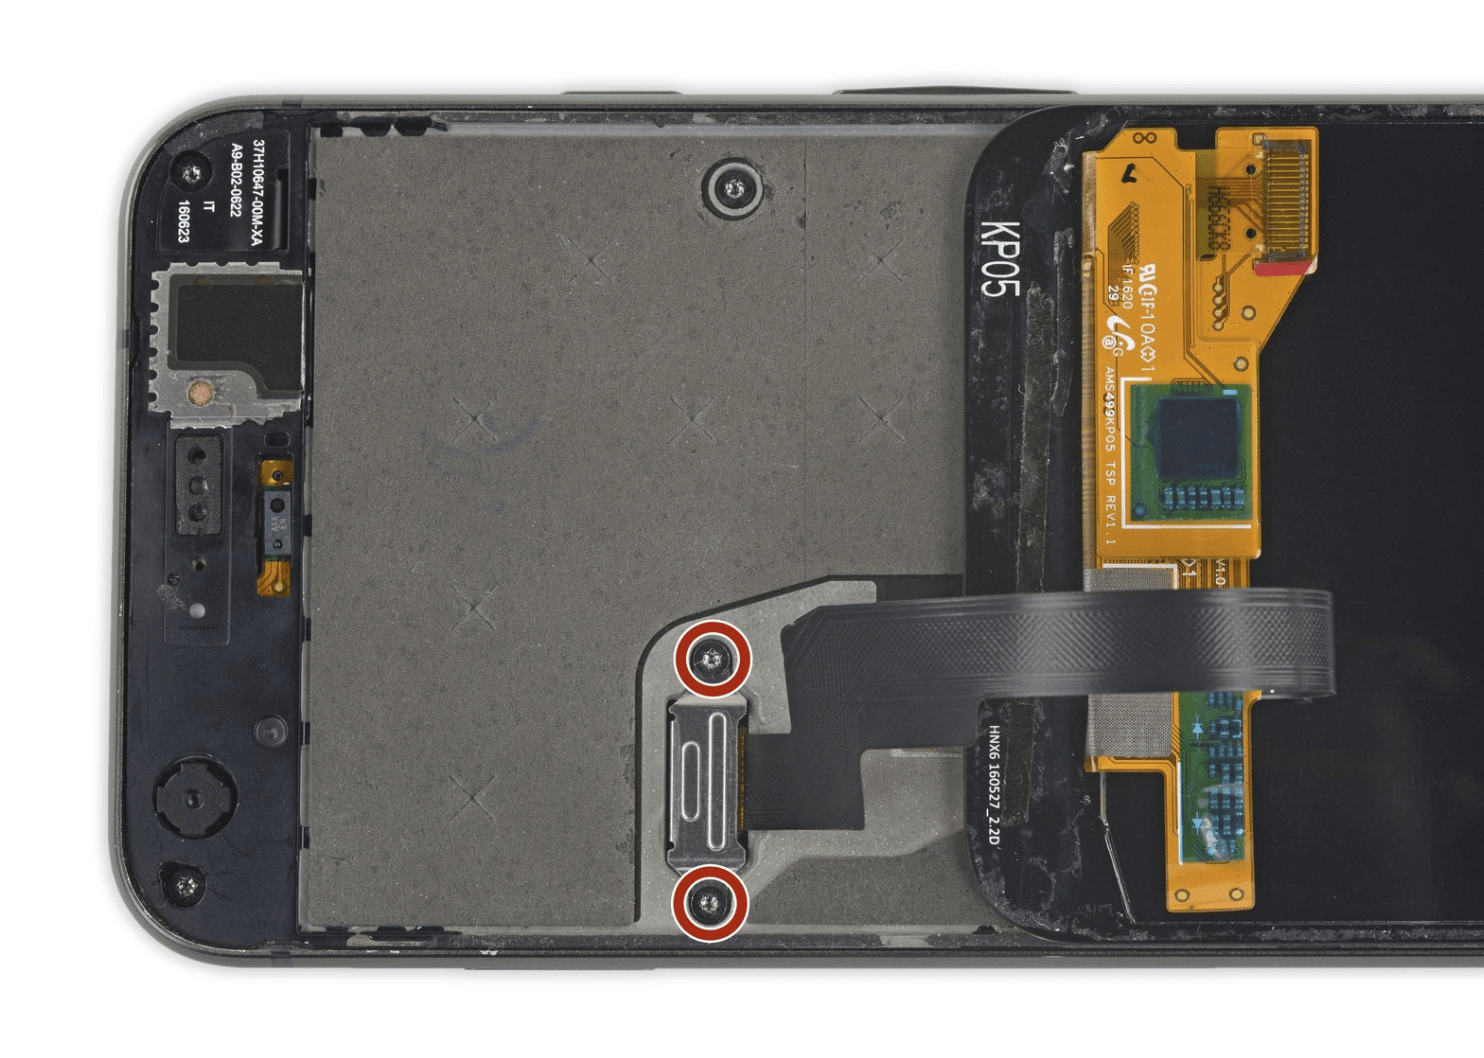
After this has been done the LCD connection is secured in with two torx screws as shown below


After removing the two torx screws and the plate covering the LCD FPC conn you need to unplug the socket. This is often done with a pry tool such as a plastic spudger as shown below
When disconnecting the LCM FPC socket you need to use a tool to remove this. Often times a plastic spudger is used for this. When removing the connector it is imperative to lightly pry from the top side versus the bottom side of the connection. Failure to do this properly will often result in damage to the image data filters below the socket. Intact image data filters below fpc connector
4 missing image data filters below fpc connector If prying too hard on the wrong spot then often times the result will be cracking the very fragile solder joints of the 1 of 5 image data filters. This will break the connection for these components which are essential to the phone to display proper image. If a filter is knocked loose then typically what you will see is what is displayed below, a mix of blurred pixelated colors or “snowy” image because the screen (OLED) cannot make sense of the jumbled data it is getting sent to it.
pixel screen repair problems At The Mobile Hub we have seen this many times and have the tools and parts to fix this easily under a microscope. Depending on the damage and the amount of components missing or broken this repair service is very affordable at typically less than $99 with a 1-3business day turnaround time.
